Hitleap

Website Traffic

Monday, April 6, 2015

How to use OpenVPN with Injek Software

Requirements
1.Download OpenVPN for Windows 32bits from HERE
2.Download OpenVPN fpr windows 64bits from HERE
3.OpenVPN Configuration files from HERE

Advantages of  this VPN Trick
1.You can share your connection over WiFi using Connectfy or Mhotspot or virtual router
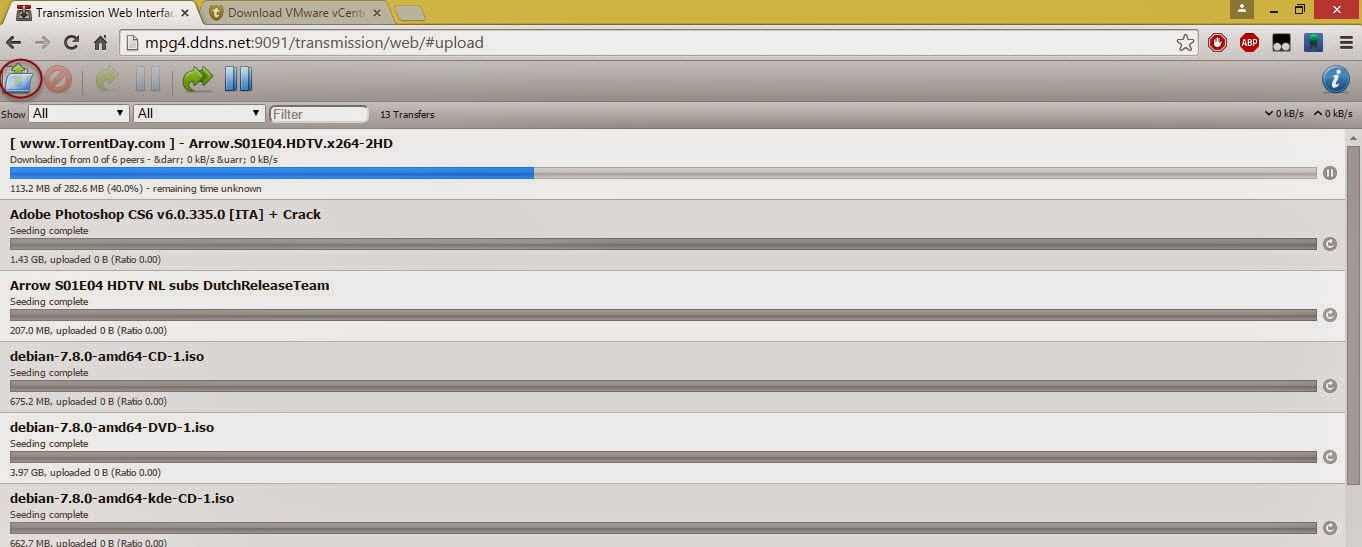
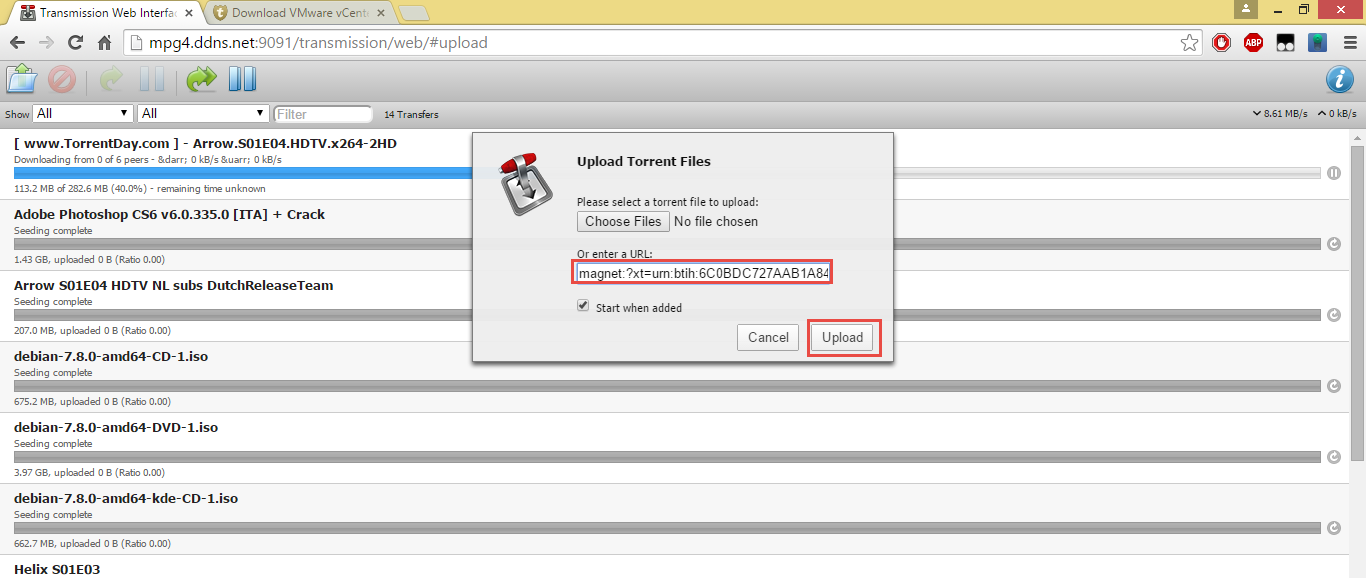
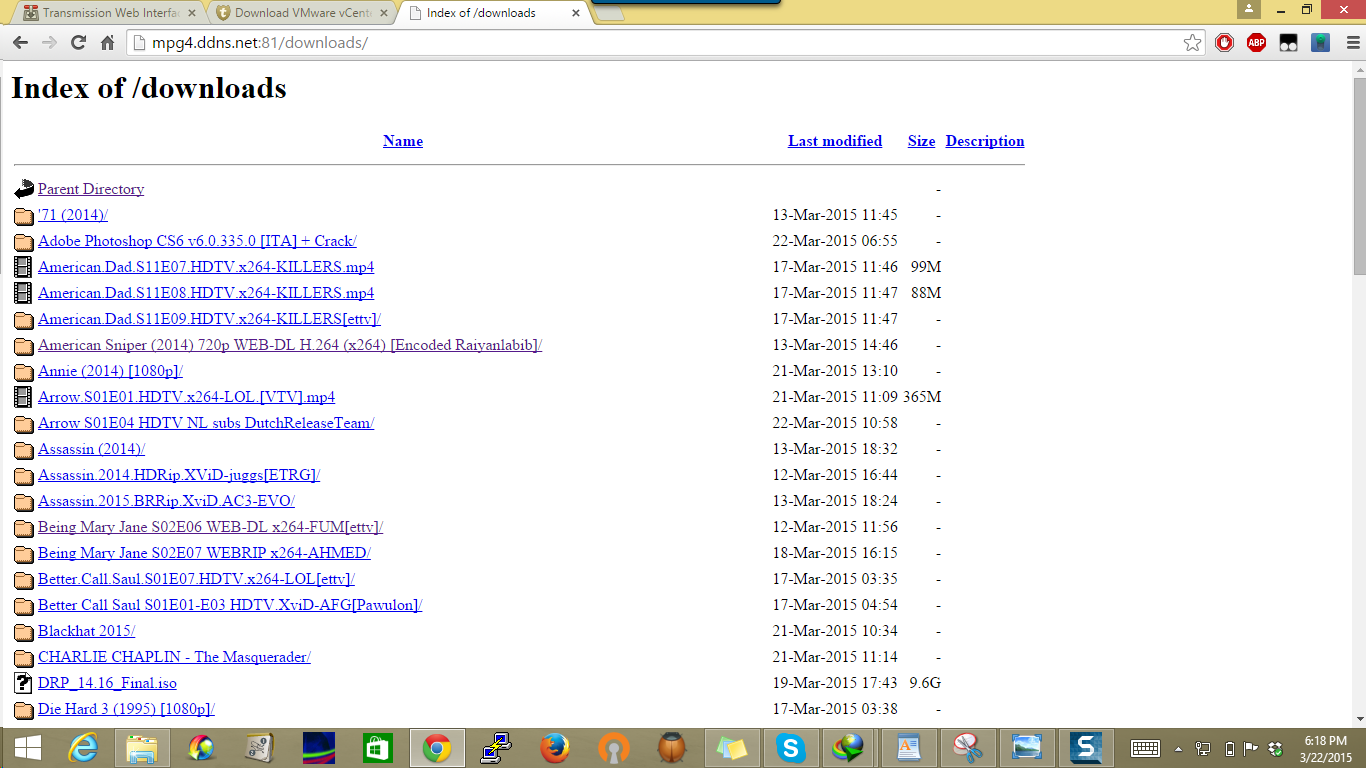
2.Can download Torrent
3.Multiple Internet connection at high response speed

1.Install OpenVPN

Itabidi ku-install Open VPN ambayo itatengeneza shortcut desktop

Ifuate desktop Right click nenda Properties>>>>>Compatibility afu wekea Tick Run as ADMIN. afu apply.


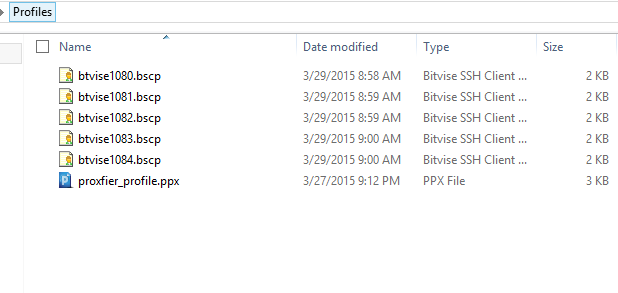
2.Transfer config files kwenye VPN


Unzip file la config files kisha fungua ile pass.txt uweke username na password nilizokutumia, katika format ya maneno uloyakuta, kisha mafile yote yaamishie My computer>>>> Local disc C: >>>>>Program files>>>>>Open VPN>>>>>config
au kama unatumia Windows 8 ni This PC>>>>>OS(C:)>>>>>Program Files>>>>>OpenVPN>>>>>Config
Ukimaliza Exit

3.Connect Modem yako kisha Fungua Injection Tool
Ukishafungua Injection Tool minya Listen kisha minimize

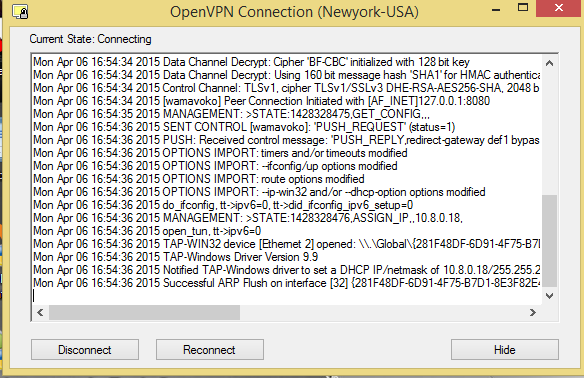
4.Fungua OPEN VPN GUI
Mara tu ukiifungua itaenda kwenye system Tray ifuate na wewe kama kwenye Picha kisha chagua server moja kwenye list kisha bofya Connect.
Nashauri kwa kuanzia mtumie USA server

Itaanzakutapokea Initial packet ya kwanza na itaendelea mbele kama ilivyo picha hapa chini


Mwisho wa siku OpenVPN ikifanikiwa ku connect itaji minimize tena kwenye System Tray/Taskbar na itabadilika rangi kuwa kijani


You are now connected enjoy browsing


Sunday, March 29, 2015

How to Configure the Injection Tool and Multi-SSH

Introduction
I have used many Proxy tools with proxifier but  I realised many proxy tools will not open some pages,will not download Torrents,may or may not support multiple internet tasks e.g Downloading and browsing at the same time,Howerver in my Reserch I came across this tool called multi-ssh which is coded using Bitvise knowledge,I will use same tool today to bypass the bad side of so many proxy tools using SOCKS5 proxy.

Advantages of this Trick
>>Multiple internet tasks supported
>>Torrents supported
>>Can Upload large files to any website unlike other proxy tool
>>No much errors during proper connection
>>Internet can be shared over WiFi using Tun2Socks

Requirements
1.Download and Install Bitvise from HERE
2.Download the Injection Tool  HERE
3.Download and Istall Proxifier from HERE
4.Download Bitvise and proxifier profiles from HERE
5.Download ad Install Winrar/winzip from HERE


1.Unziping the files
I will assume every reader of this blog can unzip a .rar or .zip file using winrar/winzip,if you don't have knowledge ask in the comments section for help.
However am beginning with this step because among the requirements, there is File named profiles and I would like to explain the contents and shall be used later in this tutorial.The profiles.rar after unzipping shall contain bitvise profiles(with VPS login details) and Proxifier profiles as show below


2.Setting up Proxifier
Download Proxifier and unzip/extract it and Install the software,Open the software and navigate to Files>>>>>Import profile and locate the profiles folder to file named to proxifier_profile.ppx .Keep proxifier Open and dont close it yet

Note this step is done once and shall not be repeated during connecting to server 

3.Setting Up the injection Tool v1 and Multi-SSH
  • Make sure you have unzipped your injection tool.rar file,Open the folder and inside the injection tool folder open the application name injection tool.exe.Make sure the Dial up connection is Green in color as shown in image below.
  • If there is no greenish color on that point,please disconnect your modem and reconnect it using Modem dashboard 


  • Click Listen button on  left of Injection Tool  and minimize the application


  • Open the Profiles folder which I would prefer you put it on your desktop for easy access,Right click on one of the Bitvise profiles e.g Bitvise1080.bscp and select Open.This requires you to make sure you have installed Bitvise from the requirements link
  • Press the Proxy settings  on the front panel of the bitvise window and make sure proxy settings are set to listen on 127.0.0.1 and port 8080.If not set so fill in as shown in image below and save.


  • Repeat the procedures for all the remaining profiles i.e Btvise1081-Btvise1084.You may be asked to save some keys,Please accept so as to proceed.


  • If you have successfully done all these procedures as explained above, you task bar will contain some white bitvise icons and the proxifier running with Blue statistics


You are now connected enjoy Browsing


Saturday, March 28, 2015

How to Activate QSAT Q28G Preloaded Accounts and Scan TV channels

Introduction
Its no more news that Qsat factory recently released a new box going by the name of QSAT Q28G as of 1st March and some curious people and some installers might have ordered this box for testing, QSAT Q28G comes to replace the Speed HD S2 which is DVB-S2/T2 i.e both boxes have Terrestrial and Satellite tuner at their back.The other features of QSAT Q28G are significantly the same as QSAT Q26G.Qsat Q28G Comes with AcamHD and Speedcam under Xcam setup but when you activate AcamHD the box will respond saying Box hasn't account or account expired.In todays tutorial I will guide you on bringing Spycam menu into xcam setup and scanning Terrestrial channels,DSTV and Canal 22w Channels

Box basic features
Chipset:Sunplus1512
Function: LAN+Wifi+Youtube+Youporn+IPTV+ sim card (Inner GPRS)
two-accounts-for encrypted English(DSTV) and French channels(Canal 22w)

DVB-T2/S2 COMBO(Key feature is T2 Tuner)
Suppport cccam, newcam, mgcam

It is not only a receiver
1.- DLNA,Sat to IP,Multi-screen interation
2.- IPTV,Youtube,Youporn


Some Tips
  1. You need to download QSAT Q28G software for your box to work
  2. Qsat q28g comes with double servers(1 for dstv and the other for canalsat) that are not directly accessible to users at this time: 
    1. The two preloaded accounts that helps you to decrypt either your dstv or your canal 22w channels are embedded into the “spycam” menu(after loading new software). 
    2. Unfortunately, despite the fact that you can easily view your spycam menu under “setting>>>>>xcam setup>>>>spycam, you can’t access the accounts inside the spycam like the new QSAT Q26G. 
    3. The issue of not accessing Spycam would bring hestancy to people during renewal time,but am sure this is a minor issues because the box I received from the factory for testing has both AcamHD and Speedcam and the AcamHD is accessible though activation says the box has no account or account expired,This directly tells us that during renewal of service account engineers can still offer another software to make renewal easy or implement new method of service renewal using Receiver MAC Addresss
    4. To view your expiry date on q28g, simply wait for the message to appear on your screen like “welcome to server.. you have 365 days remaining.
    5. There is no “AcamHD” or "Speedcam" or  “DQCAM” inside q28g after loading new software. 
    6. All you will have is “SPycam” with those the embedded two accounts(dst* account and canalsat account)
    You don’t need to manually activate your qsat q28g preloaded code with green button or red button as, immediately a good internet connection is detected by qsat q28g, your servers will be activated and your validity days will start counting immediately.

    How to configure your QSAT Q28G for first Use
    • The first thing you will have to do is to load a software that will bring  to your qsat q28g the Spycam menu.Download this software if and only if your box did not come with Spycam menu.
    • Download QSAT Q28G Software from HERE


    • After upgrading your decoder, the next thing is for you to scan your channels as explained below:
    • To rescan your channels, goto installation>>>>>password is 0000>>>>>Antenna Setting>>>>>Installation Type>>>>DVB-T2 or DVB-S2
    • Select DVB-T2 if you have Terrestrial antenna directed in specified direction depending on tv transmittors in your area with its wire end put under RF IN and select DVB-S2 For Satellite dishes with end wire terminating into LNB IN
    • You will get All Free and scrambled terrestrial channels but you will only view Free channnels with no $$$ sign,inorder to view terrestrial TV with $ sign you will need to mobilize your local hackers to setup Card sharing server/CCcam, if the channels are that much worthy

               For more Details about Canal 22w  Visit Lyngsat


    The next step is for you to configure your preferred internet protocol. 
    you can do this by choosing either gprs, lan internet, wifi connection or 3g network under Settings>>>>>Ethernet config

    Once you have setup all these correctly simply switch off your QSAT Q28G and you should see the "Message welcome to server,,," and if server is not down you will immediately begin viewing channels

    QSAT Q28G VS QSAT Q26 Which should You buy?
    I would Recommend people to go for QSAT Q28G instead of the QSAT Q26G because QSAT Q28G has all features the Q26 has but QSAT Q28G has an extra DVB-T2 tuner for you to enjoy terrestrial TV in you area.Note that some parts like Nigeria have no important free to air terrestrial TV channels while some parts like Ghana, Kenya and Tanzania there are plenty of terrestrial TV .
    For my fellows in Tanzania you will presently get almost all local channels ITV,TBC1,EATV,CH10,STAR TV,CITIZEN etc

    CONCLUSION
    With this new entry of QSAT Q28G I advice some local card sharing geeks to setup CCcam server for some local terrestrial TV.We all need to watch local news and local entertainment channels and also owning a terrestrial antenna is much cheaper as compared to Dish antenna.


    Sunday, March 22, 2015

    How to Use Transmission GUI to download torrents with High Speed

    Introduction
    I've used rTorrent and wTorrent and also ruTorrent and various Web UIs for rTorrent but I've came to the conclusion that the best way (for me at least) for remote Bittorrent download is Transmission Remote GUI - I've been using it for a few days now and love it.

    How to use?
    1.Visit your favourite torrent site e.g http://kat.ph and search a torrent file you want copy the magnet link which shall be used in few steps
    2.Visit a Transmission web interface which is usually in this format http://ip_address_of_machine_running_transmission:9091/ 
    e.g http://mpg4.ddns.net:9091


    2.Click the button with red circle in the image above and the following pop up shall appear
    Paste you magnetic link or locate a .torrent file and click Upload

    Wait the torrent file to download to 100%

    3.After the file has download visit the Download page which is usually in this format
    http://IP_adress/Downloads
    e.g http://mpg4.ddns.net/downloads or mpg4.ddns.net:81/downloads
    search the file you upload and download it


    Conclusion
    Thats all you need to download torrents at high speed
    Some HTTP(s) proxy services will not work in opening the transmission web interface though they will open the download page
    For any query leave a comment in this blog


    Saturday, March 21, 2015

    How to view the 7 HD channels on Eutelsat 7A with BISS Keys

    Introduction
    Bein Sport 1HD  Bein Sport 2 HD  M6 HD  W9  BFM TV  EQUIDA PRO & HUSTLER HD (adult) Channels are available on Eutelsat 7A at 7° East.
    Channels are  BISS encrypted and can be easily unlock if you have an appropriate receivers .
    • Satellite information: Name: Eutelsat 7A(Azam TV direction)
    • Position: 7° East
    • Frequency: 12522 Polarization: Horizontal
    • Symbol Rate:  27494
    • Dish size required: 60+cm
    • BISS Keys: 3184752A068163AE


    After Scanning your decoder channels will appear with the name feeds
    Feed_W for W9
    Feed_BM for BFM HD
    Feed_CS2 for Bein Sport 2 HD
    Feed_SB for Bein Sport 1 HD
    Feed_H for Hustler HD
    Feed_M for M6

    How to Decrypt the channels under QSAT/XMASTER and other set top boxes
    Navigate to Xcam setup>>>>>Patch
    Edit the biss keys you are not using as shown in this image

    Conclusion
    Its worthy reminding that the adult content must be locked if you have a family with under 18 children
    To lock the channels in any STB go to Channel Manager select the channel you want to lock and press the button Corresponding to LOCK
    You will not be able to decrypt these channels if you have no BISS keys editing Set top boxes
    Boxes feom Pay TV e,g DSTV,Azam tv,starttimes etc do not have this feature
    Lets keep enjoying these Beinsports channels for UEFA CHAMPION LEAGUES in conjuction with Irib TV3 AND Irib Varzesh on Arabsat,Irib BISS keys are 1111113311111133   and Telemedia(On Eutelsat 7A) BISS keys are 1903AAC6530554AC

    How to Upgrade AZSKY G6 and Use CCcam

    Introduction
    AZSKY G6 comes out of the box not supporting 3G Modems,in this tutorial I will cover to Upgrade your AZSKY G6 software so that you can use 3G Modems to watch encrypted channels using CCcam/Mgcamd module

    Requirements
    1.Huawei 3G Modem(Huawei E303 and Huawei Hi link modems will not work)
    2.AZSKY latest software supporting Huawei modems which you can download HERE
    3.Winrar software to unzip the software above from HERE
    4.Constant power supply during upgrade if any interuption occurs the box shall be bricked
    5.Backup your G6 incase something goes wrong under MENU>>>>>SYSTEM SETTINGS>>>>>UPDATE & BACKUP
    6.Virus Free pendrive/USB flash


    How to Upgrade
    Before you proceed to upgrade you must into consideration that if power goes of during upgrade the box shall be bricked thats why recommend you do a backup.Its worthy noting also that the above software given is in .rar file and therefore you must make sure that the software is unziped using WINRAR which is also given above to reveal the .ssu file  which is the software itself.Now that you have unziped the the software in your Computer,input the .ssu file into the pendrive and insert the Pendrive into the USB port of your AZSKY G6 at the front or back panel and then follow the following steps

    1.On your remote navigate to  MENU>>>>>SYSTEM SETTINGS>>>>>UPDATE & BACKUP


    Backup to USB if you had not done so or proceed to Upgrade to Upgrade by USB


    Open the USB flash to see the contents and navigate to the right side where there is .ssu file and  select it to Upgrade.
    A pop up window will ask you if you need to upgrade the file,Click yes to accept and let the box upgrade to 100% with no power interuption after which the box will reboot itself


    2.Now the box will Lose all data and therefore you need to rescan your box
    Satellite: Eutelsat 36A/W4 or any other satellite of your choice
    Scan mode: Blind scan

    3.Configure your 3G network now ready to use with CCcam.
    Navigate to System settings>>>>>Network setings.


    Network interface should be set to 3G network and should be set to auto connect
    If the modem is compatible with AZSKY G6 then it shall connect automatically


    4.Now fill your c line/CCcam account into your box by navigating to MENU→OTHERS→SERVER SETUP
    Switch: ON
    Server name: server 1 or 2,3 etc
    server adress,Port number and Password are sent to you from your trusted CCcam usually in this format
    some trusted CCcam companies for DSTV 36E are TV1 CCcam,Bestcam CCcam, AONE CCcam,Killer CCcam,Superlink CCcam etc

    Format
    C: wamavoko.ddns.net 12000 user340 test90
    C for CCcam protocol
    C: Server adress Port number username password

    If you collectly fill you C line then after save & exit you will see Login OK under work status


    Try to open one or several encrypted channels and you will see that everything works


    CONCLUSION:
    Thats all I prepared for you today for those who do not know where to buy their ZAP CCcam,Canal 16E CCcam,DSTV CCcam you can contact me through my email njunwawamavoko@gmail.com for price list and all clients should abide by the terms and conditions which shall be attached into their email containing the price details


    How to use your Smartphone as Qsat remote control

    HOW TO GET STARTED
    1.First and fore most if your remote is full functional You have to enable “Remote control” in your QSAT from OFF to ON and if by any means yours is deceased or some buttons are no more working then you will have to borrow a fully functional remote to enable this feature. 
    2.Make sure your QSAT is on the same Local area network with your Smartphone and here you will require USB wireless dongle/wifi adapter and a router or a PC with mHotspot/connectify software for making your PC a router
    3.Navigate to MENU>>>>>SETTINGS>>>>>SYSTEM>> >REMOTE CONTROL and while in the menu SWITCH must be ON and not OFF see image for summary of this


    4.Download any application for Sunplus chipset boxes and for my Android smartphone I will recommend Sunplus STB Remote which you can download from Google Playstore

    5.And as you Open the app in your smartphone it will begin searching for server and it will discover DAQI GMOTE

    6.Select Daqi Gmote and it will Open other three menu Remote,DVB app and About

    7.Select Remote if you want to enjoy your smartphone as a remote control

    And at the bottom there is Navigation for more REMOTE functions e.g RED,GREEN,YELLOW AND BLUE Buttons which are of more functions in Qsat are also listed down

    8.If you want to see your Channel List then on procedure 6 press DVB app

    Thats ALL for today Enjoy your phone as your remote control
    For any Qsat problems in Tanzania please pick my phone number or email adress

    How To get started with TunnelGuru HTTP Tunneling


    REQUIREMENTS
    1.  Download TunnelGuru client From HERE
    2. Download and Install Java from  HERE 
    3. Download and Install Winzip from HERE
    4. You must have Free TunnelGuru(TG) account username n Password  from HERE
    5. TunnelGuru premium voucher which you can get from me whatsapp/call +255753932250
    How to use TunnelGuru Unlimited Internet

    1.Apply Voucher to your account By visiting this Link HERE


    2.Install Winzip if not yet from the above link under requirements
    Locate the Tunnelguru client .zip file in your computer under downloads/compressed and place it on the desktop
    Right click the .zip and select Extract Here as shown below

    You will have the folder with the following contents


    3.Open the TunnelGuru setup depending on your windows version
    Configure the client as shown on below image
    Note that tz.kaymu.com is web host for MIC Tanzania and it may change depending on your network
    Dont close the client yet after configuring

    4.Click the About button on TG Client interface and the following window will show up


    5.On your computer Keyboard press CTRL+C to copy the TG Number above,after this open up your Browser and Login into your TunnelGuru account panel or click HERE to Login and paste in the number above into One of the box for TG number and click UPDATE.Note its in Only one box and the second should be used as reserve.See image below


    6.Now that you have finished setting up TunnelGuru for first use,Connect your Modem and Maximize your TunnelGuru(TG) and ensure it has settings as shown under step 3
    If NOT repeat filling the configuration and press the START PROXY button  so as to connect to server.Some pop up will show up as warnings/errors,do not worry Click OK on every pop up window that comes and the final/last Pop up window should have SUCCESSFUL message if the final message is an error please canncel TG client,disconnect and reonnect the modem and re-open the TG and click Start proxy again till the following final pop up has successfull message


    7.Configure your browser following below images and preferably Mozilla Firefox

    CONCLUSION
    Finally if you want to enjoy HTTP proxy tunneling you need to learn how to use Proxifier following my tutorial  on How to use Proxifier with TunnelGuru